If you are searching for how to delete duplicate files on Windows 10 on the web, you are in the right spot. In another way, in this article, we will discuss the standard and expert methods to find and delete duplicate files on Windows 10.
In this age of readily net availability, downloading and storing files has never been so easy. Though downloading and storing files is easy, it has an underlying limitation. In particular, these processes give rise to duplicates. Thereby the duplicate files take up unnecessary space in your computer. For this reason, the computer slows down. These duplicate files are such as photos, videos, audios, archives, documents, etc. Besides this, if you want to know how to manage duplicate pictures, follow the guide on how to delete duplicate photos on Windows 10.
Nevertheless, the efficient way to deal with such files is to trace and remove them. Indeed, there exist a couple of techniques to delete duplicate files on Windows 10. In this write-up, we will discuss 2 ways:
- Using Windows Built-in tools
- Using A Trustworthy Solution – Duplicate File Remover
How to Delete Duplicate Files on Windows 10 Using Built-in Tools?
Finding and deleting similar-looking files on Windows 10 can be challenging if you are doing it manually. Fortunately, Windows 10 has an in-built tool to scan and remove duplicate entires. Hence, this can be a easy to access and wise choice to locate and eliminate duplicate files. Further, it can be helpful to enhance the PC performance. Let’s find out how to use it from the following:
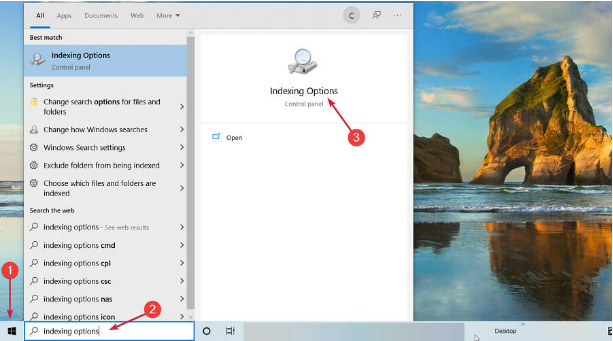
Step 1: Click on Type here to search. Then enter “indexing options”. After that, click on the app showing Indexing Options in the search results.
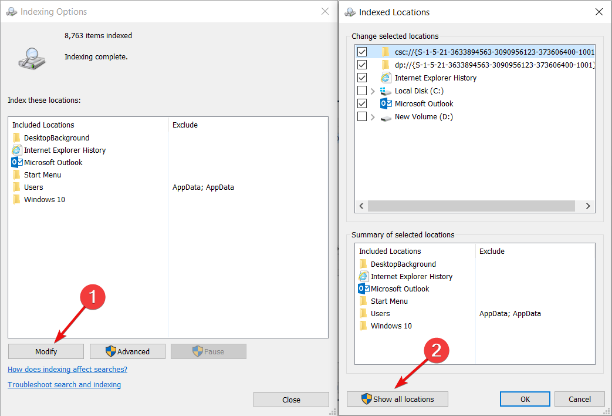
Step 2: Next, tap on the Modify button. Then, the next window will appear, click on Show all locations.
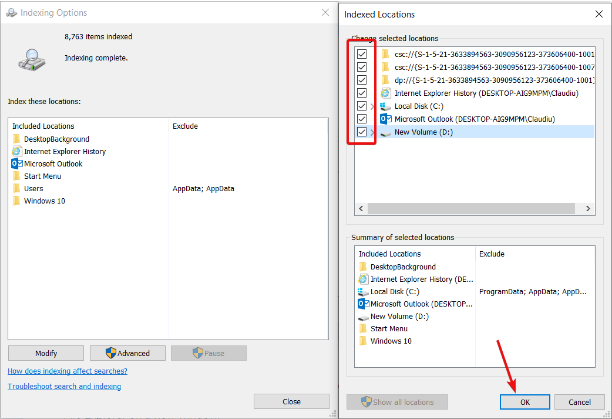
Step 3: Tick all the appearing boxes and click OK.
Step 4: To launch the File Explorer, use the keyboard shortcut Windows key + E.
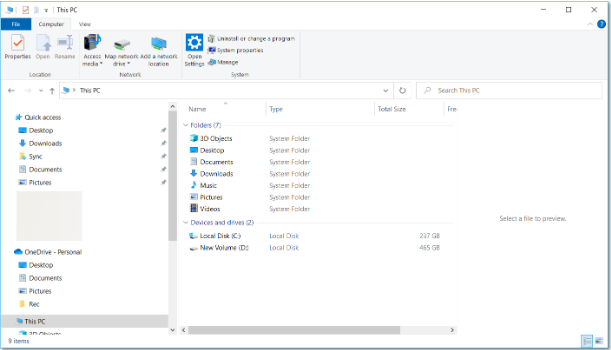
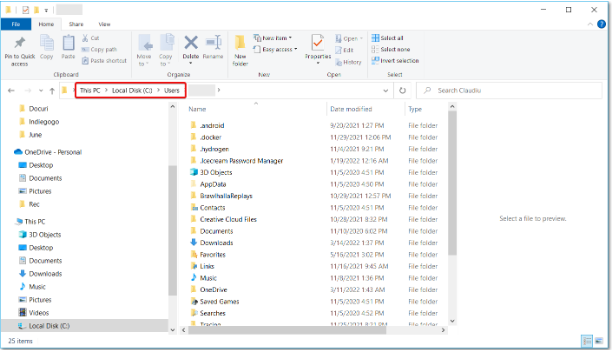
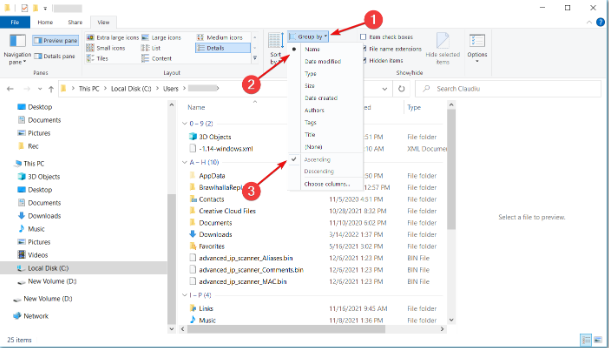
Step 5: Now navigate to This PC>Local Disk (C:)>Users.
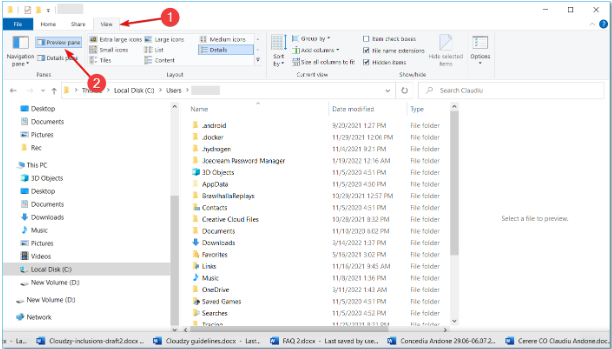
Step 6: Follow the Steps below to sort the files:
Go to the View menu. Then, tap on the Preview pane. This will list the different preview options of all files you want to select.
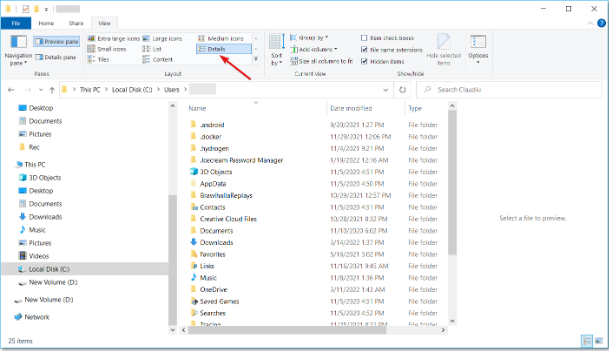
Now, in the layout section select the Details.
After that under the Current View section, click on Group by drop-down list. Then, choose Name and make sure the Ascending is checked.
Step 7: Next, type the file extension you want to eliminate in the Search tab of File Explorer. After that, find the duplicate files in the File Explorer Window.
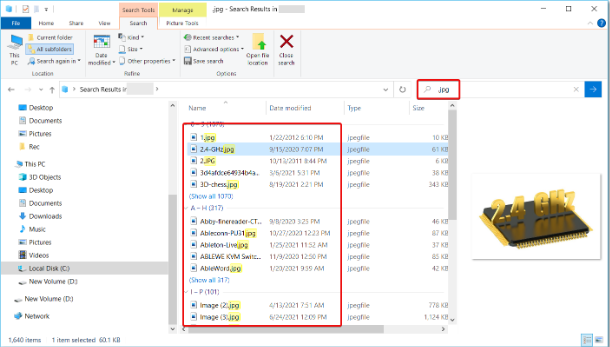
Step 8: At last, check the file names, dates modified, and sizes of the duplicate files. If you wish to delete a duplicate, simply click on it and hit the Delete button.
Given below is the list of common files and their respective file extensions.

The aforementioned steps enable you to delete duplicate files using File Explorer. Moreover, this method is straightforward and doesn’t require any third-party tools.
How to Delete Duplicate Files on Windows 10 Using Automated Solution?
No doubt, the above method to delete duplicate files on Windows 10 using File Explorer is straightforward, but it has certain limitations such as:
Time-Consuming – Though it is a built-in feature, it takes a significant amount of time to complete.
Accuracy – Sometimes the results shown have a marginal gap of similarity. Also, it doesn’t show accurate results even if the images have slight variations.
Less Customizable Features – Fewer options are available to change the scanning structure.
Considering the above limitations, automated software will be the best in removing all the duplicate files. For instance, the highly recommended automated solution is SysTools Duplicates Finder & Remover. This tool is smartly crafted considering the needs of the user. Want to free up your PC space, then this professional tool is a worthy choice. Like other third-party tools, make sure to download and install the Duplicate Finder tool on your PC to get started. To delete the duplicate files follow the steps precisely:
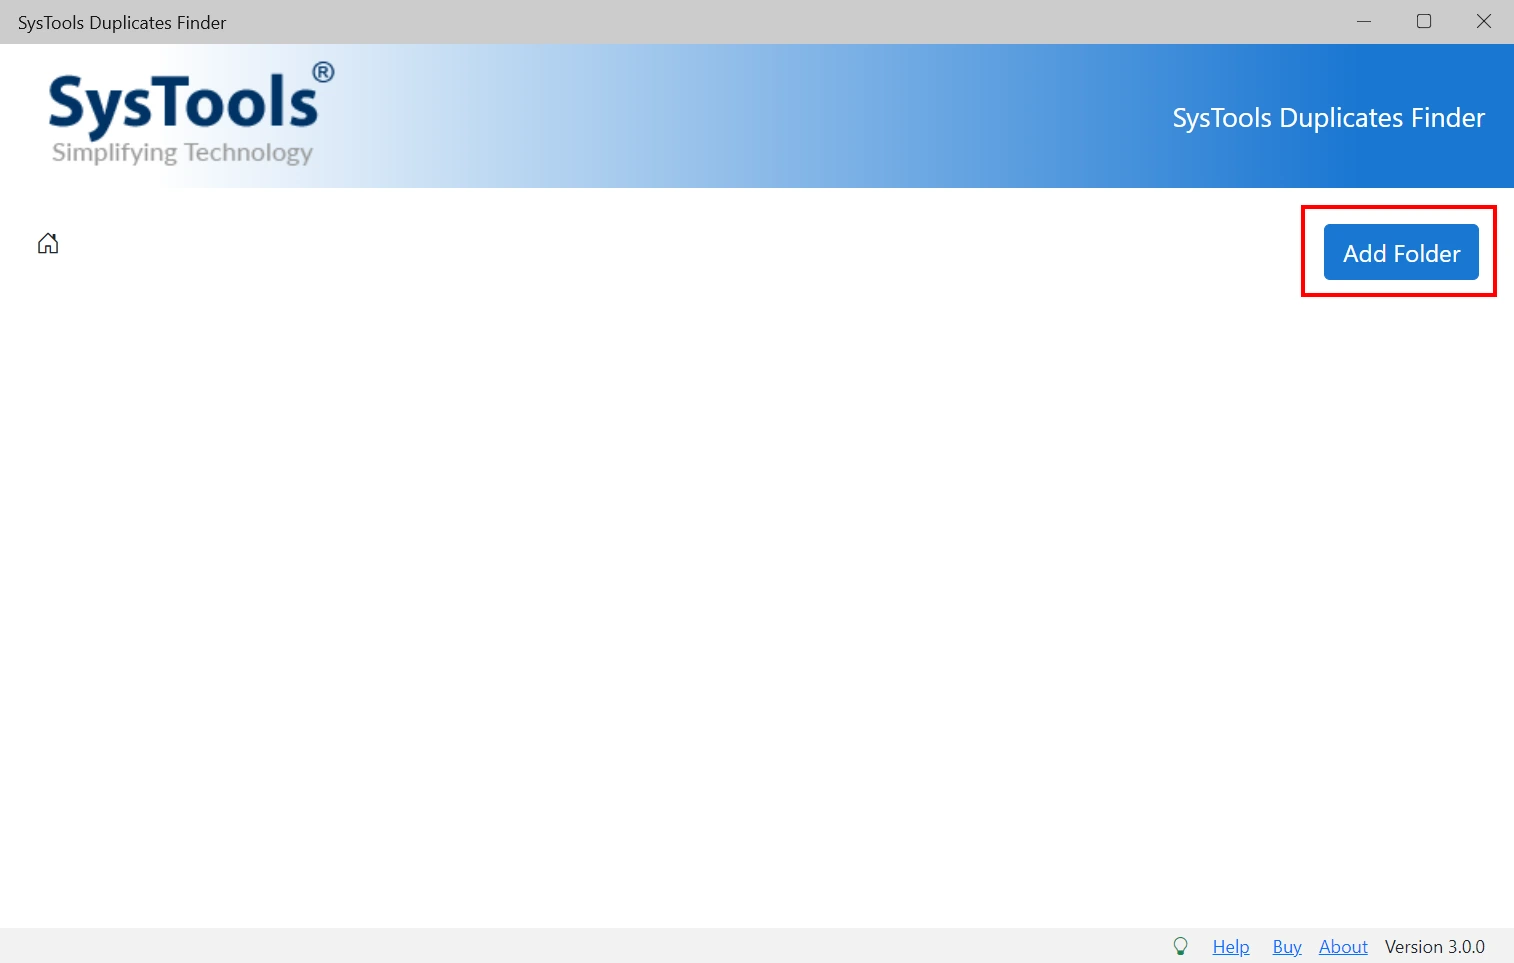
Step 1: Launch the software. Then, click on Add Folder to select the folder in which you want to perform the operation. After you are satisfied with the folder selection, click on OK.
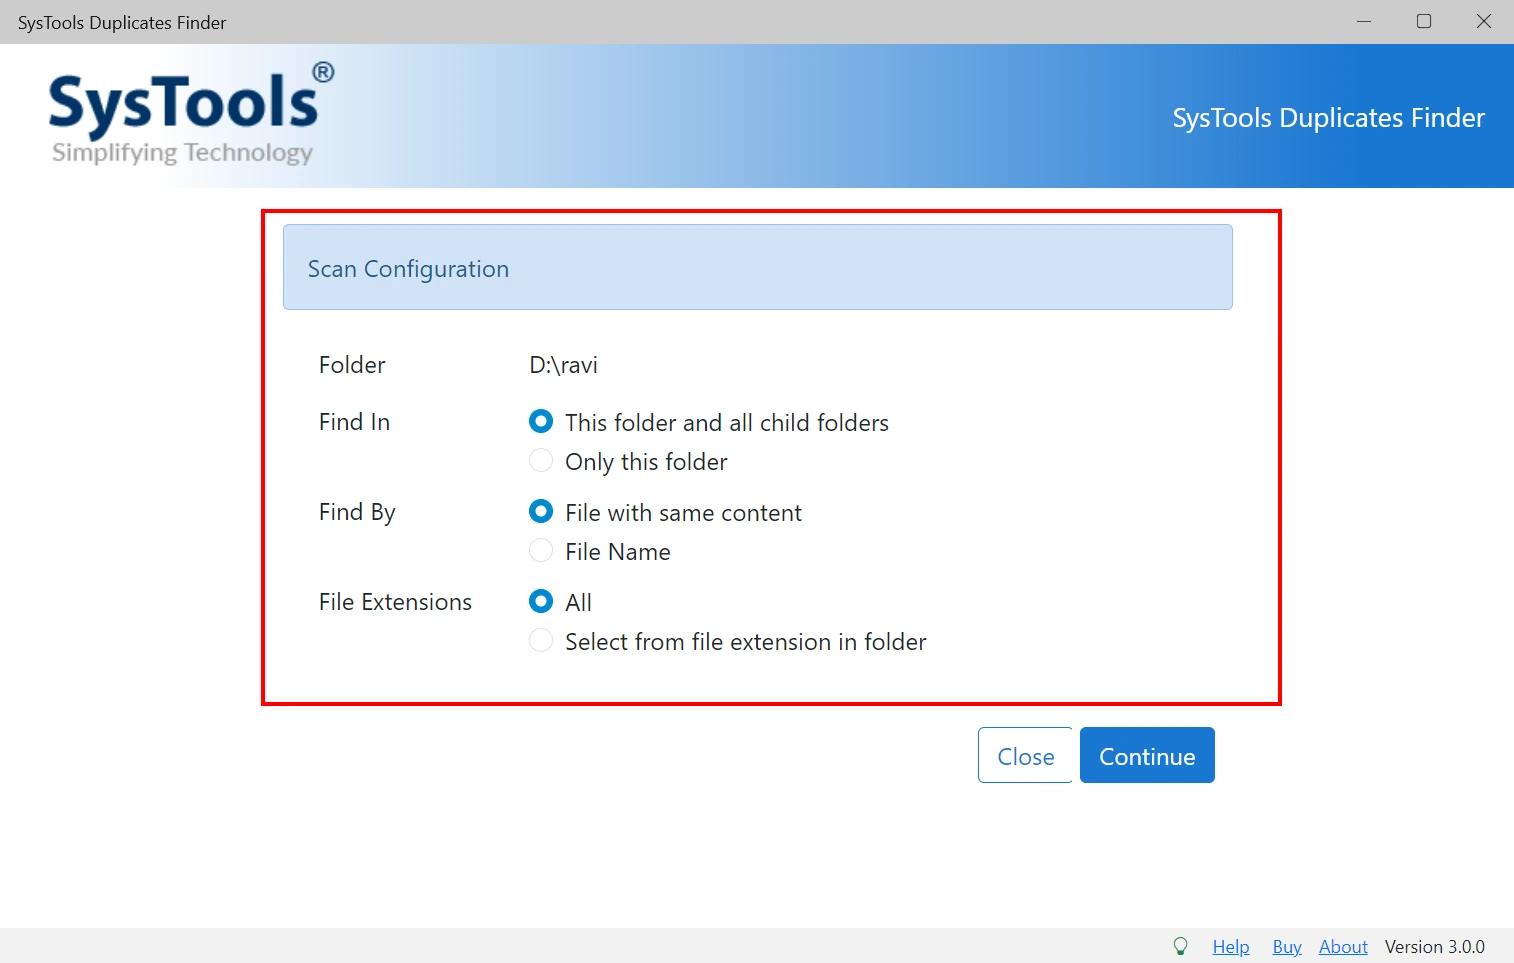
Step 2: A new Scan Configuration window will appear. Here, choose the desired scanning options. Then, click on Continue.
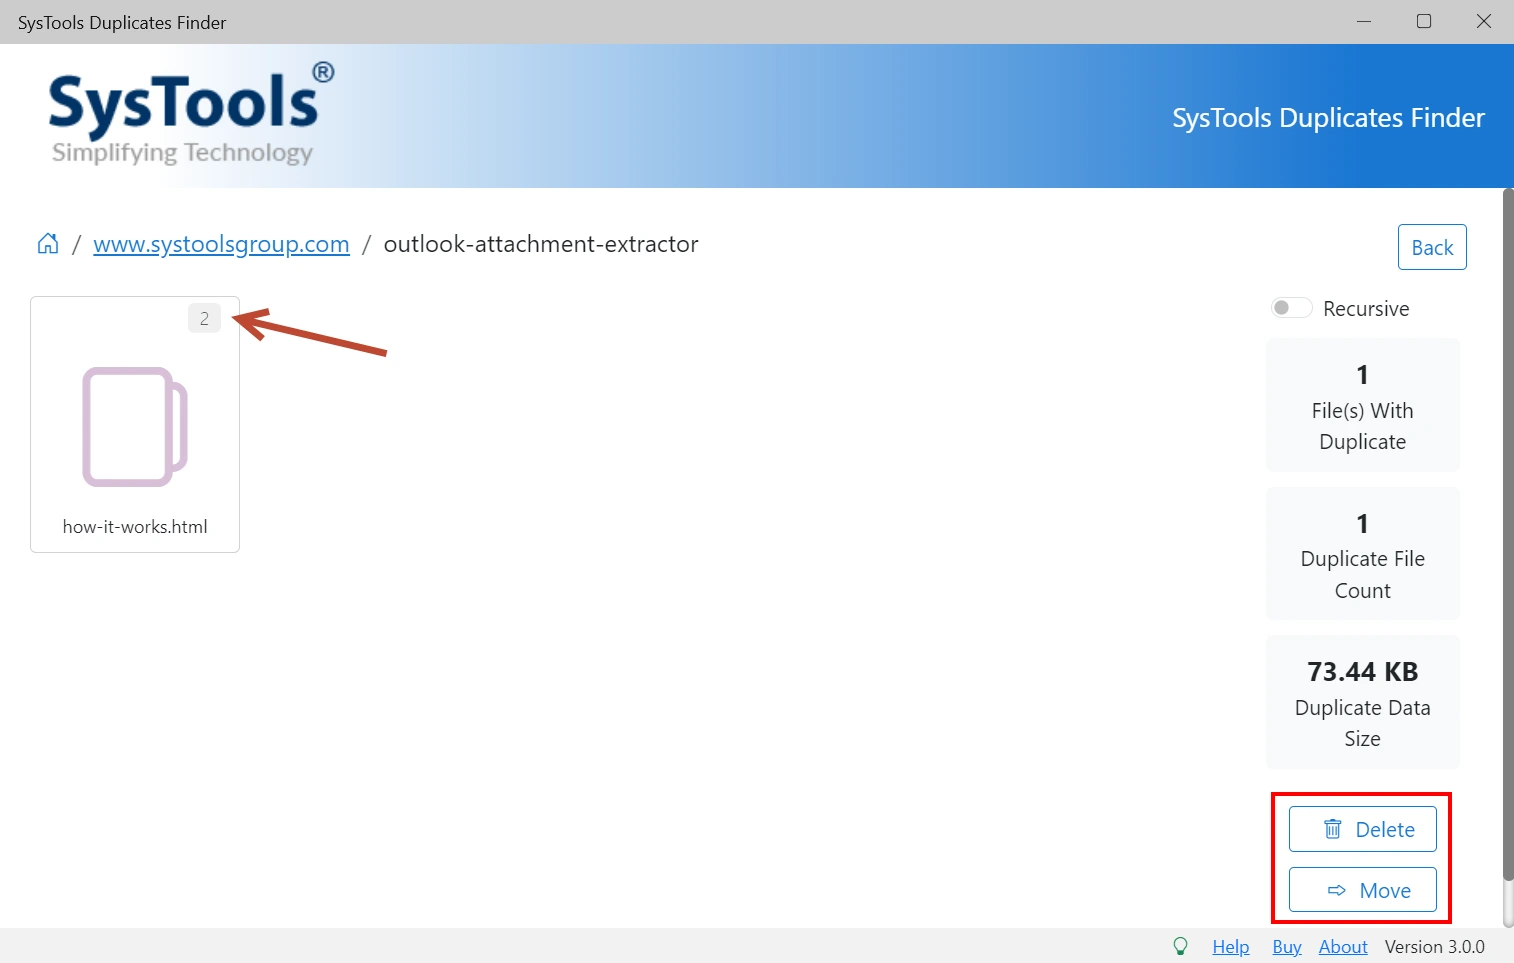
Step 3: After the completion of scanning, a final window will appear to perform the requisites such as preview, delete, and move.
Final Thoughts
After going through the write-up, now you must have got the answer to the question “How to Delete Duplicate Files on Windows 10?” After this, you appear to have gotten the idea of the exact way to erase similar files set from your system using the built-in tools and automated solutions. Undoubtedly, the built-in tool is easily achievable but it is not reliable. On the other hand, the professional tool provides a huge coverage with different customization options. Thus, among the two methods, Duplicate File Finder & Remover is the most preferred one.